
The question: What do I make my Mom for her birthday??
I needed something quick, and something a little grown up-ish. Don't get me wrong, my mother loves everything I make her, even if it's the ugliest thing. She still have some old cigar box I painted in preschool (I believe) that has painted shell noodles glued on it.
No, really.
So, I remembered reading a wonderful blog recently, Sew Take A Hike. The insanely creative mind behind it, Penny, was working on a quilt-along quilt as go project where the each block was different, using up scraps. Quite beautiful.
Ding Ding Ding, we have an inspiration.
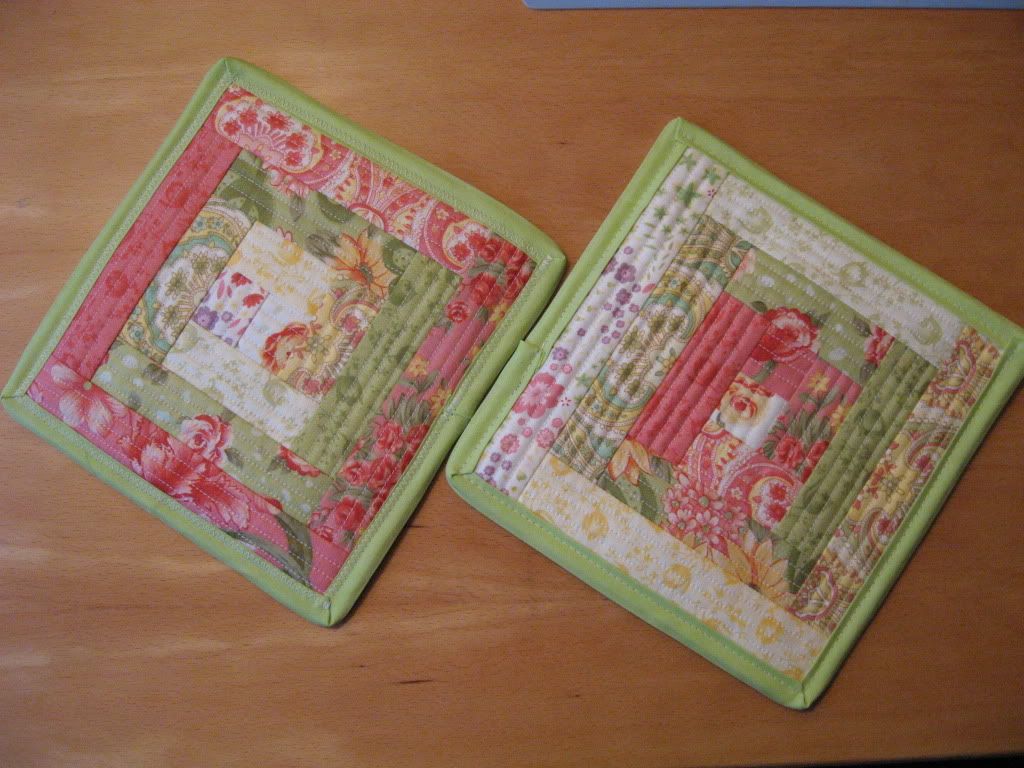
Thus the quilt as you go potholder emerged. I simply cut a 9 inch square of Insul-Bright to use instead of batting.
I had some strips left over from my first Moda Honeybun, I think I may be hooked on these...
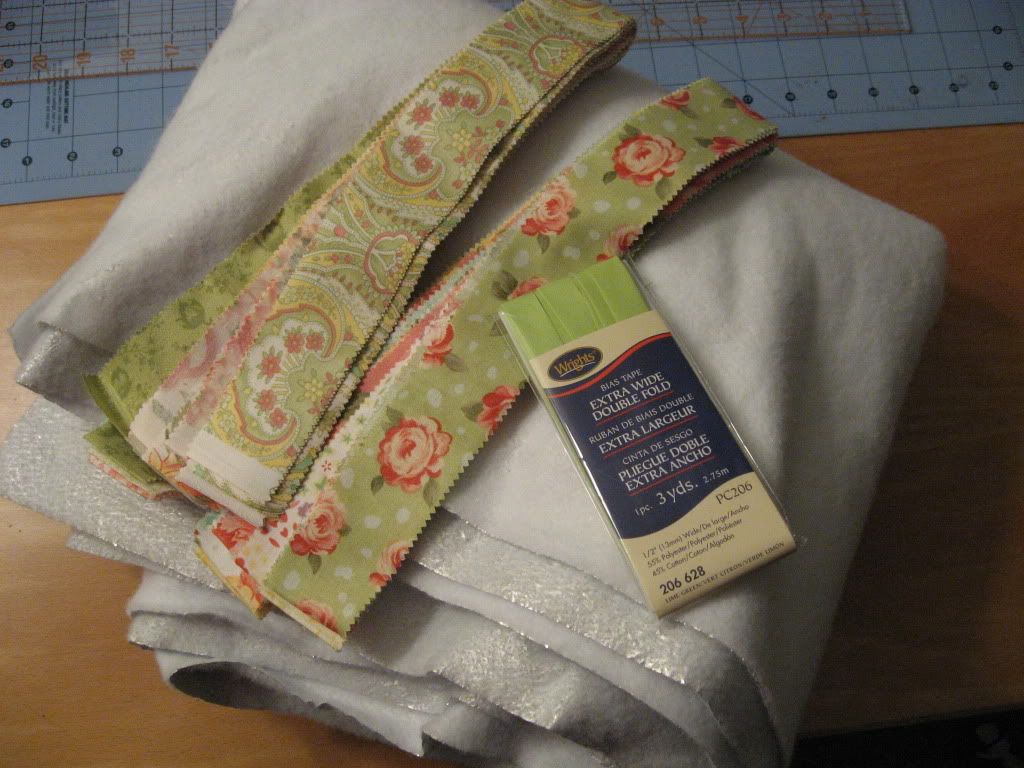
If you don't have a Honey Bun, just use strips of fabric 1 1/2" wide. I started with a square in the middle, and just kept adding strips around and around until it filled it up, quilting each strip as I went. I did not measure anything, which was one thing I really really liked about this project. I just trimmed the rest of the strip after I sewed it on. Easy peasy!
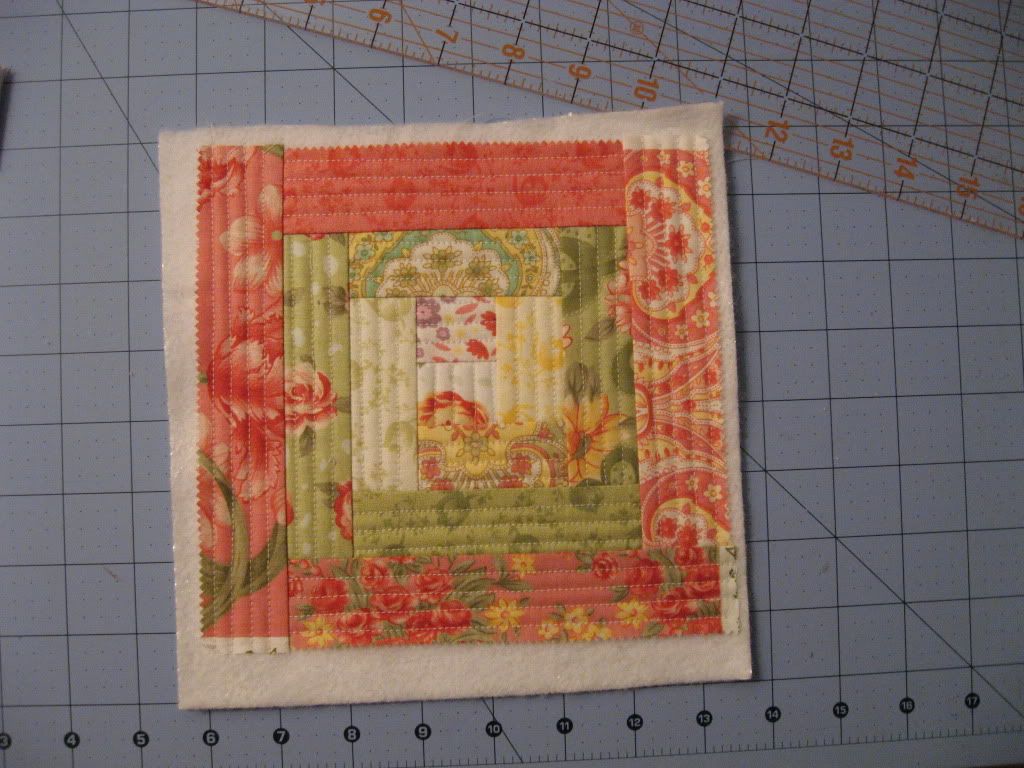
Using 2 layers of Insul-Bright seemed a must, so for the back of the potholder I used unbleached muslin and just sewed it onto another layer of Insul-Bright using a decorative stitch.
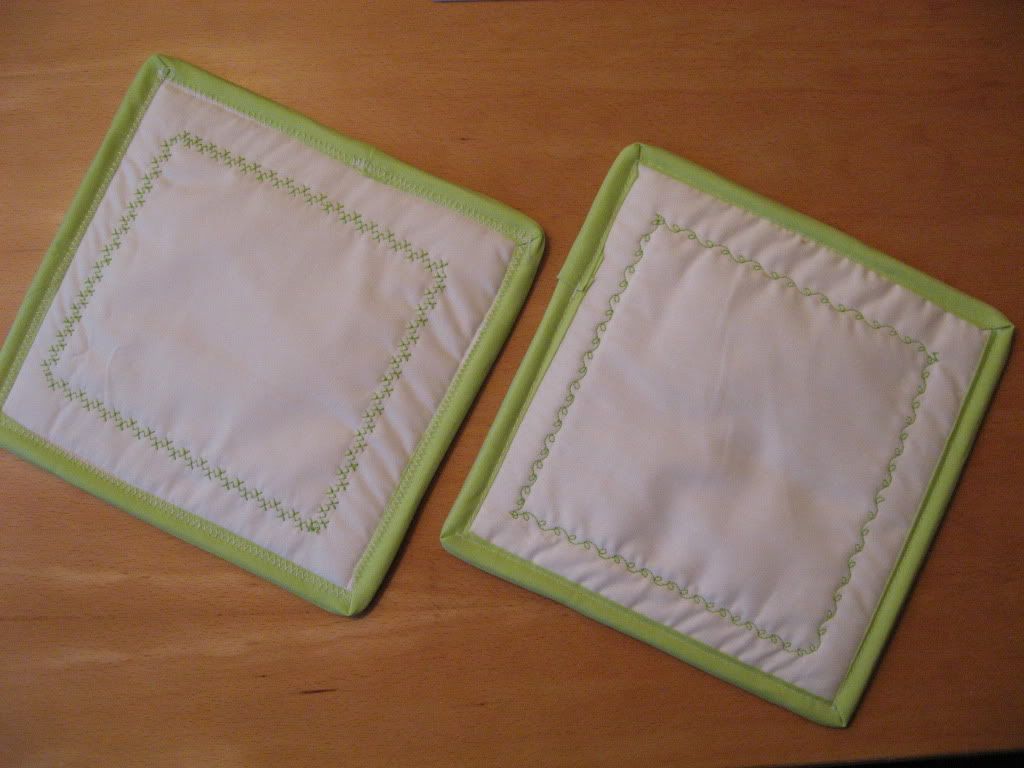
Basted the 2 layers together, put binding around each one (I clearly need to work on some pre-packaged binding skills...), and done.
I think I'm going to use my fine permanent fabric marker to write a message in the middle of the back to make it a little more personal.
I quite like how they turned out, and Mom likes them too. They're definitely a step up from the last potholders I gave her when I was 8 that I made with loops and a loom.
They are beautiful! Thanks for the instruction
ReplyDeleteI made those loop potholders when I was a kid too! It was fun but fingers could get through the loops and ouch!
ReplyDeleteLyanna,
ReplyDeleteYour potholders are lovely; bright and well made.
Your binding is just fine. Binding is a no-win process for me - there HAS to be an easier way!
Thank you for sharing.
Very pretty!!! I think I am going to make my Dad a few sets to match the curtains my sister and I are making out of farmall fabric for his new cabin. Thanks for sharing,
ReplyDeleteBeautiful potholders! You need to know that the problem isn't your prepackaged binding skills, it's your prepackaged binding! The commercial stuff is just too stiff to work with, in my opinion. So I started cutting my own bias strips to make both single and double fold binding, and now I don't ever use prepackaged binding. The variety you get by making your own is an added bonus - prints, stripes, it all looks great. No more boring solids! There are good tutorials you can find by Googling DIY bias tape. I think you'll find that your skills greatly improve the first time you bind potholders (or anything else) with your handmade bias binding.
ReplyDelete