November 30, 2011

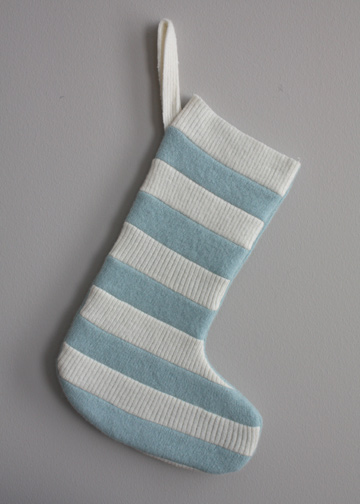
Tons Of Tutorials - Make Your Own Christmas Stockings

It's the last day of November, so Christmas crafting is either in full force or completely done for each of us and I'm sure someone out there needs to whip up a stocking or two to deck their halls with.

If, by chance, you don't have a need for some stockings then head over to Purple Panda Quilts because Lyanna (I KNOW, how amazing that she's got the same name as me!) does an annual stocking drive for foster children from October 1 to December 1. There are lots and lots of tutorials on her site as well.

Here is a compilation of TONS of different ways to create a stocking (quilting, sewing, crochet, and knit), from vintage-y to modern styles.

All but one pattern is FREE!

Each link takes you to the pattern for stocking, or if you want to be extra creative you can just use one of these as a template to create the shape you like and use whatever you have/want.

Quilted:


Scrap Stocking @ Maggie Makes

Christmas Stocking @ Stamp*Stitch*Create (bought pattern)

His and Her Scrappy Christmas Stocking @ Moda Bakeshop

Sewn:

Recycled Sweater Stocking @ The Long Thread

Rick Rack Stocking @ Martha Stewart

Jingle Bell Stockings @ Martha Stewart

Recycled Wool Stocking from Scraps @ Resweater

Knitted:

Zig Zag Stocking by Vicki Howell @ knitting.about.com

Personalized Knitted Christmas Stockings @ Canadian Living

"Basic Sock" Christmas Stocking @ Pickin' and Throwin'
Both Crochet & Knit Patterns @ Berroco.com

Crocheted: 

Waiting for Santa Stocking @ Red Heart

Holly & Berry Stockings @ Red Heart

Free Christmas Stocking Pattern By HolyJeans30

Happy Crafting!

November 28, 2011

My First Table Runner

Here it is:


I love how it turned out!


It's reversible, and both sides are quilted differently.


Things worked out exactly how I hoped they would, so it was a breeze.


It's a Christmas gift and since it was gifted already I can definitely post about it, lucky me!

What gifts have you finished already?

Our Creative Spaces

November 22, 2011

To Grandmother's House We Go

Tonight we head out!

Our 'little' family will be going to my grandma's house in West Virginia, I've only blogged about it a few times... here, here, and here.

Thankfully, we'll be stopping tonight at my Dad's in Maryland and staying the night. It'll be nice to break up the drive, it would be about 7 hours one way (and that only includes 2 short stops) otherwise. Making that drive in a Mazda MPV with 4 kids isn't exactly easy/fun.

I've got a project (possibly two) going along with me. I'm pretty excited to get lots of hooking done on this soon-to-be baby blanket (on Ravelry here):


This is a project that was inspired by Lucy at Attic24, she's doing a ripple-along, her ripples are simply adorable!

Loving all the colors. Maybe I'm trying to get more into scrappy crochet... I've got tons of granny squares that I need to kick myself into making into something because I think I'm abandoning the original King-sized plan for them. (I know, how horrible to abandon an original project... it's either that or it's gonna sit for much longer than it already has.)

Wish me luck (and sanity...).

November 17, 2011

Double Cabled Hat Pattern


This hat is great, and fits well since it is knit entirely in a cabled stitch. The head circumference is more of a ballpark figure in the sense that this hat will stretch quite a bit. 

Materials:
  • Caron Simply Soft (or any yarn with 4.5 stitches per inch)
  • Size 6 and 7 16" circular needles
  • Size 7 double pointed needles (dpn)
  • Stitch markers
  • Cable stitch holder
  • Yarn needle
  • Scissors

Pattern:
(intermediate level)
Sizes: 19" (16 1/2", 21 1/2")
  • Cast on 96 (84, 108) stitches
  • Repeat chart all the way around until piece measures 5 (4, 6) inches from the bottom. (Chart below)
  • Begin decreasing on a row which you will NOT be cabling. You will also continue to knit in pattern throughout decreasing.
  • 1st decrease row: *Knit 10 in pattern, Knit 2 together, place stitch marker* repeat until end of row.
  • 2nd row decrease: knit entire row in pattern.
  • Repeat 1 decrease row and 1 row knit in pattern, with each subsequent decrease row like this: *knit in pattern until 2 stitches remain before a stitch marker, knit those 2 stitches together* repeat.
  • Repeat until only 8 (7, 9) stitches remain, switching to dpn when comfortable. 
  • Cut 8 inch tail and thread tail into needle and through remaining stitches. 
  • Weave in ends.
  • Enjoy!


Chart Explanation:
Cable 4 Front means you place the first 2 stitches on a stitch holder or cable holder and bring them to the front of your work. You then knit the next 2 stitches, then pick up the stitches on the stitch holder and knit them. 

Cable 4 Back means you place the first 2 stitches on a stitch holder or cable holder and bring them to the back of your work. You then knit the next 2 stitches, then pick up the stitches on the stitch holder and knit them.

Edited to add: I would LOVE to see any projects you create with this pattern! Feel free to join & share in my Flickr group: Your Lyanna Jean Designs.

Just a reminder, my patterns are for your personal use and enjoyment only. They have not been tested, so if you find an error feel free to let me know at lyannajeandesigns@gmail.com.

Our Creative Spaces


November 16, 2011

Yesterday Was A Good One

First, I want to share with you the best part of yesterday: we got my oldest sons school pictures back.

Now, he's the joker when it comes to photos, and is always the one making faces. Needless to say, my fingers were crossed all day picture day that he would take a nice photo.


I couldn't be happier!!

It was somewhat painful to pay for these photos considering I just got a nice new camera for my birthday, but I am a sucker for school photos. (The color is a little off since I took a photo of a photo)

Another awesome thing about yesterday is that I did little selfish sewing and made a journal cover. I quite like it, I'll put together a tutorial the next time I make one for sure! It went so quick.

Front
Back
Inside flap

This cover came about because I am starting a scripture journal. I found this really really great site called The Redheaded Hostess and her journal is simply amazing! I have never thought of putting one together like this, and I am so so glad I found her site and can be motivated by her spectacular example. I'm a really looking forward to studying each of the topics, I used her outline as a jumping off point especially since this style of studying is new to me. Even if you are not a member of The Church of Jesus Christ of Latter Day Saints, you can adjust this outline to topics that fit.

So, naturally I 'needed' a cover for my new journal. I did press it like madness, but after having to flip it to be right sides out those creases just wouldn't come out (starch and all).

Another bonus yesterday was that my oldest son had a half day at school. We headed to get free frosties with our Halloween coupons at Wendy's and then went to the bank to cash in their piggy banks (this is a super exciting thing in these parts...).

Thanks to my kids for a great day!

Our Creative Spaces.

November 15, 2011

Vintage Navy Print Dress

I love thrift stores.

I haven't been thrift store shopping in ages... well, months really, but it's felt like forever.

Every time I go thrift store shopping I look for a vintage dress for yours truly, EVERY TIME I tell ya.

NEVER have I found one, ever...

until last week. *sigh*


It was almost like love at first sight. I loved it so much, I just had to try it on (something I almost never ever do when thrift store shopping). I know the sleeves are a little short, but that's the price I often pay being 5' 9". I even got a compliment from the girls in my YW/YM Sunday school class, made my day!


It's so great I can even wear it pregnant because of how flow-y and loose it is!


On Sunday, we all went outside so my husband could take a few pictures of me. It's always awkward for me to have pictures taken, always has been. I'm glad he got a few good shots, even though I was having some serious static cling going on... I can never win.

I also took a photo of him in the vest I knitted and finished last year (and yes, I hate ironing clothes thus the wrinkled pants):


What do you think? It took me almost 2 years to finish this vest, I kept putting it aside for other projects. I put it on Ravelry here.

November 10, 2011

Holiday Crafting In Full Force

How many of you are cranking away at all your holiday crafts?

I'm pretty impressed with myself so far, a little pat myself on the back I know....

Usually December 1st rolls around, I watch it pass, and I still haven't actually started any of the projects I have lined up as gifts.

Not this year folks!

Here are 2 blocks I've finished towards a gift, and since I'm not putting any more blocks into the project I feel like I've passed a milestone within it. They're both the same block, a Star of Hope, and the green came out a little darker in the photo.


Hoping this one will be done by tomorrow.

I've already finished up making PJ pants for each of my boys and their Build A Bear guys (hoping those ones fit... making a pattern from something so tiny was a little different).

Also, on the hook this week is the first scarf (of hopefully a lot) I'll be donating to a local charity that gives tons of stuff to the needy. I'm thinking a few hats and maybe some mittens will be in order too, just depends.


I can't remember the name of it at the moment, it's kind of a long one. But, they give bookbags with school supplies in the end of summer, hats scarves & gloves in the beginning of winter, and many other things to needy children locally throughout the year. A friend from church is a big part of it, so it's nice to be able to give her stuff as I make it.

Yesterday I got 10 Simplicity patterns for $1 each. Seeing that I saved $139.87 printed on the bottom of my receipt was like winning the lottery! Oh it was great I tell ya. I only got 10 patterns, and some 1/2 off candy corn (of course), so almost all of that savings was on patterns. It's absolutely ridiculous how much patterns cost sometimes.


I'm planning on making the PJ dresses for my girls, some bow ties for the boys, and my oldest daughter and I will work on a coat for her doll for Christmas. I'm really looking forward to all the sewing to come!

I even found a great pattern that will make a cute dress for me that I'm hoping will work great for the pregnant belly and even after wards, it's #2660.

Linked up with Our Creative Spaces, please check out the site it's pretty awesome.

November 5, 2011

This Month

I was thinking it would be fun to jot down some randomness each month, you know sort of a 'to-do'/wish-list of sorts. Here goes.


This is what my marigolds in my vegetable garden looked like 2 weeks ago. I don't really want to put a picture up of what they look like now because it's just not pretty. I love how beautiful nature is and how amazing these colors look, but most of all I love how it is constantly changing. This month there is an awful lot I am looking forward to, change and all.

This month...

... I want to have a fire every single night, in the fireplace of course. Hot chocolate may accompany (grin).

... I get to have my big ultrasound. We're not going to find out what gender the baby is and I'm so very excited.

... My 'little' family is traveling to the farm in West Virginia for Thanksgiving. I can't wait! Visiting them/there in the fall is my most favorite.

... I need to tell my husband that I love him every single day because, well, I do.

... I'm hosting my first knitting/crochet group at my place, exciting stuff!! (And, I hope to get a good post up about it!)

... I want more things on my To-Do list to move to the Done list.

... I will wish most days that I had a mantel atop my fireplace because all the pine cones I keep seeing about are just calling to me. Maybe a wreath will be in order soon.

... Lots of Christmas crafting will get done, that way I don't feel so bad if I take a day to do some selfish sewing and make myself a new purse. I've had one 'on the list' since last Christmas (even have the most awesome Anna Maria Horner fabric for it, eeee!)

Photo from Fabric.com

November 1, 2011

Grandma Dot's Bobble Square


This pattern is a translation that I did from an original work of my Grandmother's. She created the pattern but stopped working on it, and lost the pattern she wrote down. I tried my best, and credit goes where credit is due!

*On a side note: this is my husbands favorite blanket (apparently it's 'his' now) because it's just warm enough. He's the type of person who is always on the warmer side, and he just loves it.


Supplies: 
  • Worsted Weight Yarn, I used Red Heart Acrylic, Super Saver size (any material will do, raid you're stash for a colorful blanket!)
  • Size H hook
  • Scissors
  • Yarn Needle

Pattern:
Block measures 7 inches square.

Pattern in US terms. I took a photo at the end of each round so that if you are a very visual person (like me) it might make things easier. Plus, you can hold up your work and compare if you want (I always do). The pins in each picture are placed in the corner stitches. Also, I got about 12-13 blocks from each skein, it is always better to get one extra skein when trying a new pattern just in case.

On Ravelry here.

Bobble: *Pull loop on hook slightly to make it a little larger. YO, insert hook into stitch on previous round, pull loop through.* Repeat twice more, total of 6 loops on the hook. YO and pull loop through all 6 loops, chain 1 to complete bobble.
  • Ch. 3, join to make ring.
  • Round 1: Ch. 3. 11 dc into ring. Join to 3rd ch. st. 
  • Round 2: Ch. 1, pull loop to make slightly larger (about 1/2). Make bobble where you joined round 1. Make another bobble between the next 2 dc from previous round. Make one more bobble between the next 2 dc from previous round. Chain 4.  Repeat making 3 bobbles then chain 4 a total of 3 more times. Join to top of first bobble in round.
  • Round 3: Slip stitch into space between first two bobbles of previous round. Make 1 bobble in space between the first 2 bobbles of previous row. Make another bobble between the next 2 bobbles of previous row. Ch. 1, 5 dc, ch. 1 all in chain 4 of previous round. *Make 1 bobble in each space between the 3 bobbles from previous round, ch. 1, 5 dc, ch. 1* repeat  from * to * 2 more times. Join to top of 1st bobble in the round to finish round.
  • Round 4: Slip stitch into space between first two bobbles of previous round. Make one bobble in space between the 2 bobbles. Ch. 1, (1 dc, 1 ch) in next 2 dc from previous round. (1 dc, ch, 1 dc, 1 ch, 1 dc, 1 ch) in 3rd dc. (1 dc, 1 ch) in next 2 dc. *Ch 1, 1 bobble in space between the 2 bobbles from previous round, ch 1, (1 dc, 1 ch) in next 2 dc from previous round, (1 dc, 1 ch, 1 dc, 1 ch, 1 dc, 1 ch) in 3rd dc from previous round, (1 dc, 1 ch) in next 2 dc.* repeat from * to * 2 more times. Join to top of bobble to finish round.
  • Round 5: Ch. 4. 1 dc and 1 ch in space between bobble and first dc from previous round. Then continue working 1 dc and 1 ch into each dc from previous round and on either side of each bobble, in each corner stitch do (1 dc, 1 ch, 1 dc, 1 ch, 1 dc, 1 ch). 
  • Round 6: Ch. 3. 1 dc and 1 ch in each dc of previous row. In each corner dc from previous row do (1 dc, 1 ch, 1 dc, 1 ch, 1 dc, 1 ch).
    Crochet the number of blocks needed to make the size you would like. Each block measures inches square. I made 30 blocks, and 40 were given to me, so 70 total.

    Sew blocks together to create the blanket. The one I'm working on is 7 blocks by 10 blocks, makes a nice throw size.


    Edited to add: I would LOVE to see any blocks/projects you create with this pattern! Feel free to join & share in my Flickr group: Your Lyanna Jean Designs.

    Just a reminder, my patterns are for your personal use and enjoyment only. They have not been tested, so if you find an error feel free to let me know at lyannajeandesigns@gmail.com.

    Linked up with:

    Tip 
Junkie handmade projects

    Related Posts Plugin for WordPress, Blogger...